Sections
This is an overview of your domain’s DNS records
In this overview we will discuss where and what you are capable of doing in your DirectAdmin Host Panel and which settings you can change, etc.
Here we go:
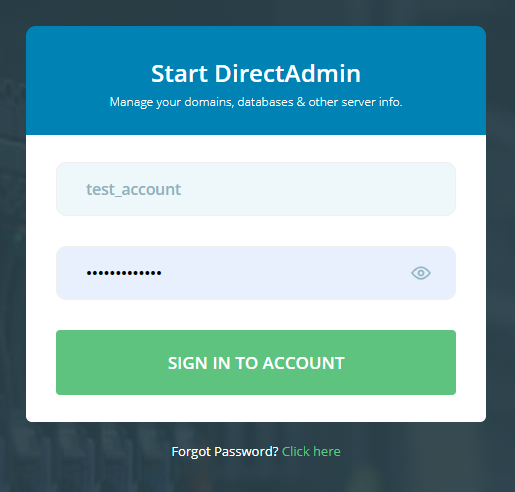
1. Log into the Direct Admin host panel using the link provided after signing up with your hosting provider. If you forgot your password, please click on “Forgot password” to reset your password
Username should be in the form of your unique USER ACCOUNT ID, e.g. r12345c
2. We suggest changing to LIST VIEW and then select DNS MANAGEMENT

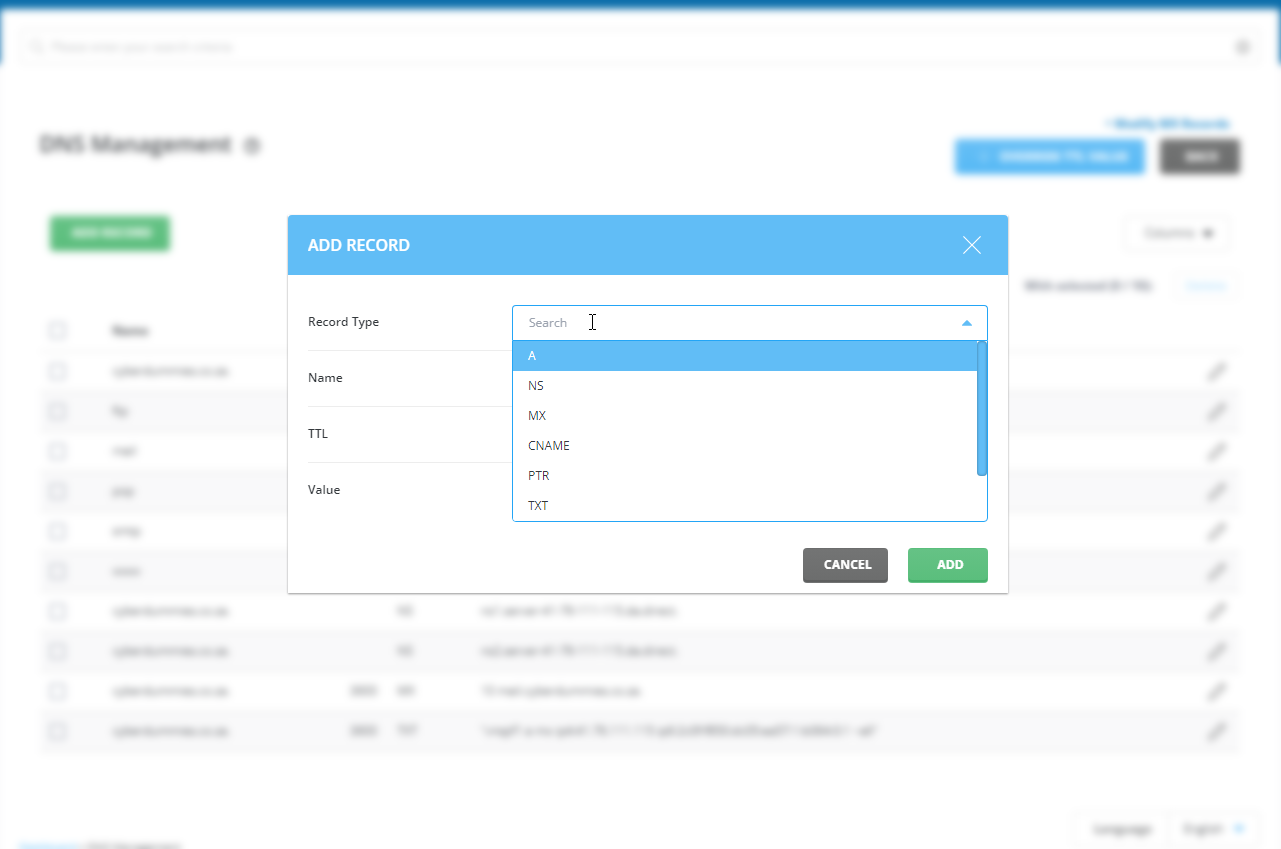
3. You will be presented with the DNS MANAGEMENT screen and have the following options:

3.1 Add Record
This option allows you to add a new DNS RECORD. Some examples include A, MX and CNAME records
You can view additional info on the various DNS records here: https://evo.site-helper.com/evo/users/dnssettings.html#dns-settings
3.2 Modify MX Record
You can either edit the existing MX RECORD(s) or select a 3rd party provider by changing the MX TEMPLATE
Please see here for instructions on how to point your MX RECORDS to a 3rd party provider like OFFICE 365 or GOOGLE SUITE

3.3 Edit Record
Here you can edit any existing record. If you are making use of another provider for your website, you would change the IP ADDRESS for the A record.

Congratulations! You should now be able to edit / add DNS records via your DNS MANAGEMENT in DirectAdmin
(Note)
After you’ve added or edited your DNS Zone Records, it will take a few hours to take effect.
Keywords:
domain overview, dns overview host panel, dns overview directadmin, edit dns settings, edit dns records, add dns records, edit dns records, change dns, edit dns, directadmin dns, direct admin dns
Related Articles