Sections
PLEASE FOLLOW BELOW INSTRUCTIONS TO SETUP YOUR DOMAIN E-MAIL IN GMAIL
1. Access your GMAIL account using your desktop computer
2. Click the SETTINGS ICON in the TOP RIGHT and then select SETTINGS in the drop-down menu.
![]()
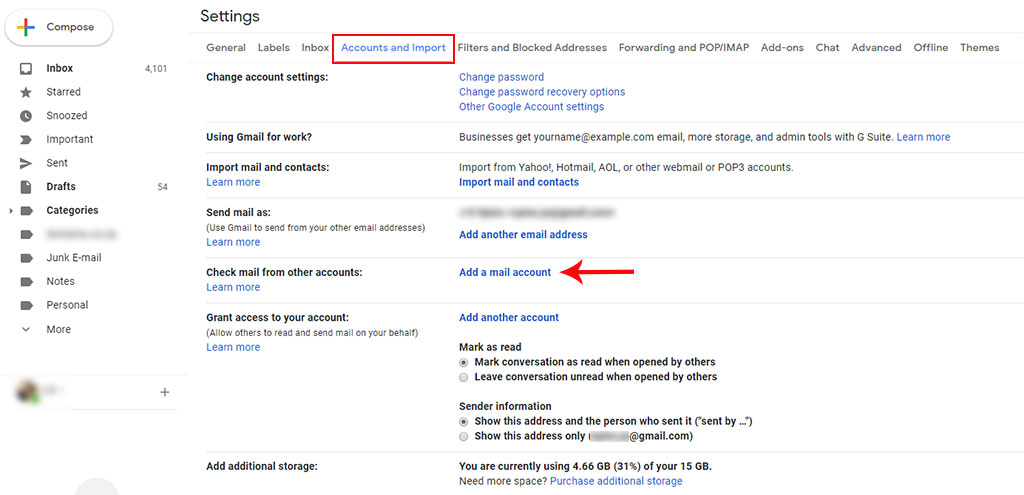
3. Select the ACCOUNTS AND IMPORT tab. Look for “check mail from other accounts” and then click on ADD A (POP3) MAIL ACCOUNT.
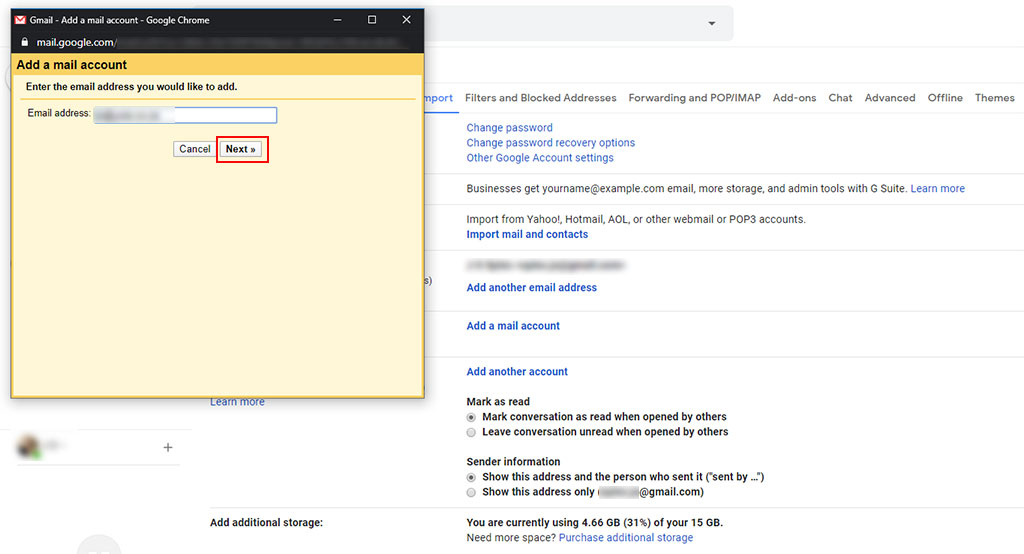
4. Enter your domain e-Mail address followed by NEXT.
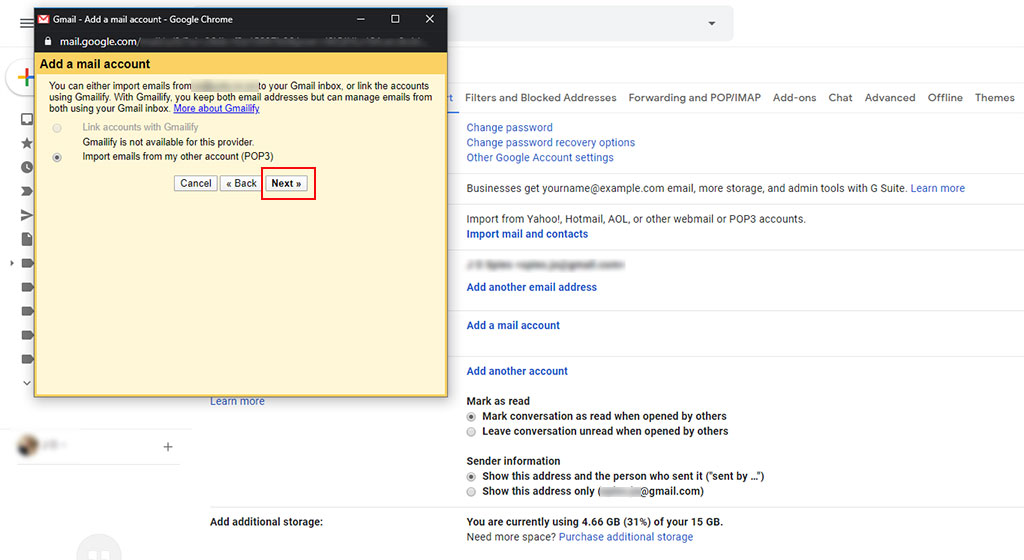
You might be presented with a screen providing you with the option to either choose between linking your accounts with GMailify (if available) or importing e-Mail from your other account (POP3). This tutorial will only focus on importing your POP3 domain e-Mail account into Gmail. In order to continue, click NEXT.
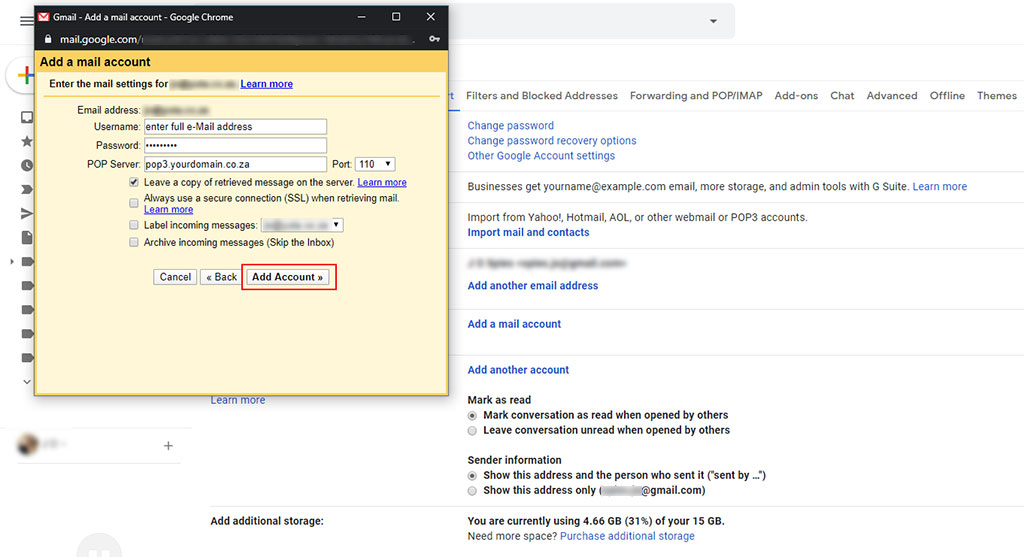
5. Now you can proceed to;
- enter your account user name. Remember that your user name is your full e-Mail address
- enter the e-Mail account’s password
- you are now required to enter your account’s POP server information, which is the INCOMING SERVER information on your “view e-Mail client info” settings. Ensure you enter the correct SERVER NAME and corresponding PORT NUMBER. Please select PORT 995 if you are using SSL/TLS. Should you decide to make use of the NON SSL settings, kindly select PORT 110 from the drop down.
Select the desired options:
- Leave a copy of retrieved messages on the server – check the box if you are also accessing your emails on another email client or device (ie. phone or tablet), otherwise the emails in your domain email account will be deleted and you will only be able to access them in Gmail
- Always use a secure connection (SSL) when retrieving mail – if you are using the Secure SSL/TLS settings, then you need to check the box. If you are using the Non-SSL settings, then uncheck the box.
- Label incoming messages – check the box if you have more than one email account set up in your Gmail; this way, you can easily see which emails in your inbox come from your domain email account.
- Archive incoming messages – leave this box unchecked; otherwise, all emails from your domain email account will be auto-archived and will not show up in your Gmail’s inbox.
Now you can proceed to click ADD ACCOUNT
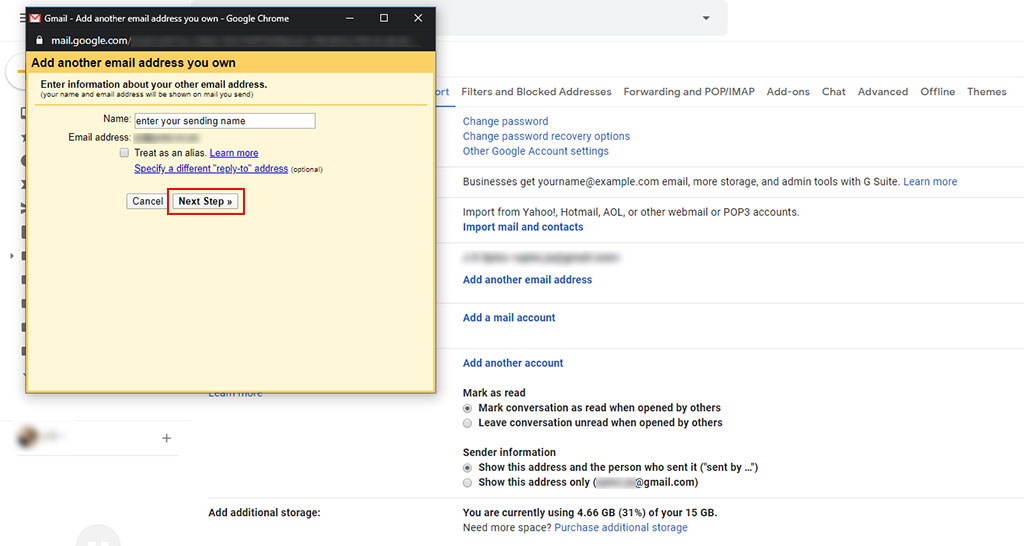
6. After successfully importing your domain e-Mail account, the option to “send mail as user@yourdomain.co.za” will appear. This option allows you to compose messages in Gmail and have appear to be sent from your domain e-Mail account. If you would like to have this option enabled, click NEXT.

7. Enter your name and click NEXT STEP.
DO NOT select the option to treat your domain e-Mail as an alias. This will cause all your mails to be sent as though it is coming from your Gmail account.
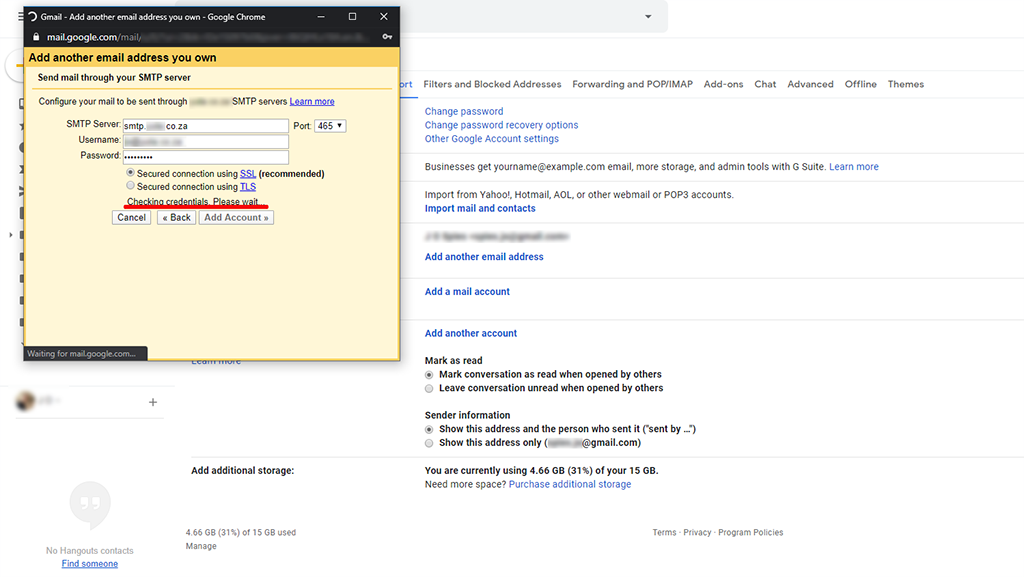
8. You are now required to enter your SMTP server information, which is the OUTGOING SERVER details on your “view e-Mail client info” settings. Once again, please ensure you enter the correct SERVER NAME and corresponding PORT number. Please select PORT 465 if yo are using SSL/TLS. Should you make use of NON SLL settings, please change your PORT from 25 to 587.
Now you should enter your user name, which is your full e-Mail address accompanied by the password.
In case you are using secure SSL/TLS, check the SECURED CONNECT USING SSL option.
When ready, click ADD ACCOUNT

9. Please allow a few moments why Gmail “checks the credentials”.
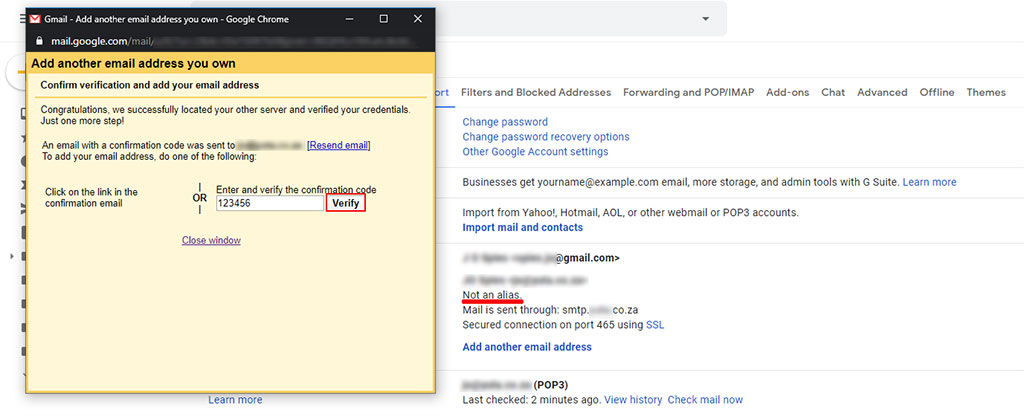
10. The final step involves the verification of your domain e-Mail account. You are required to enter the confirmation code sent to your domain e-Mail account.
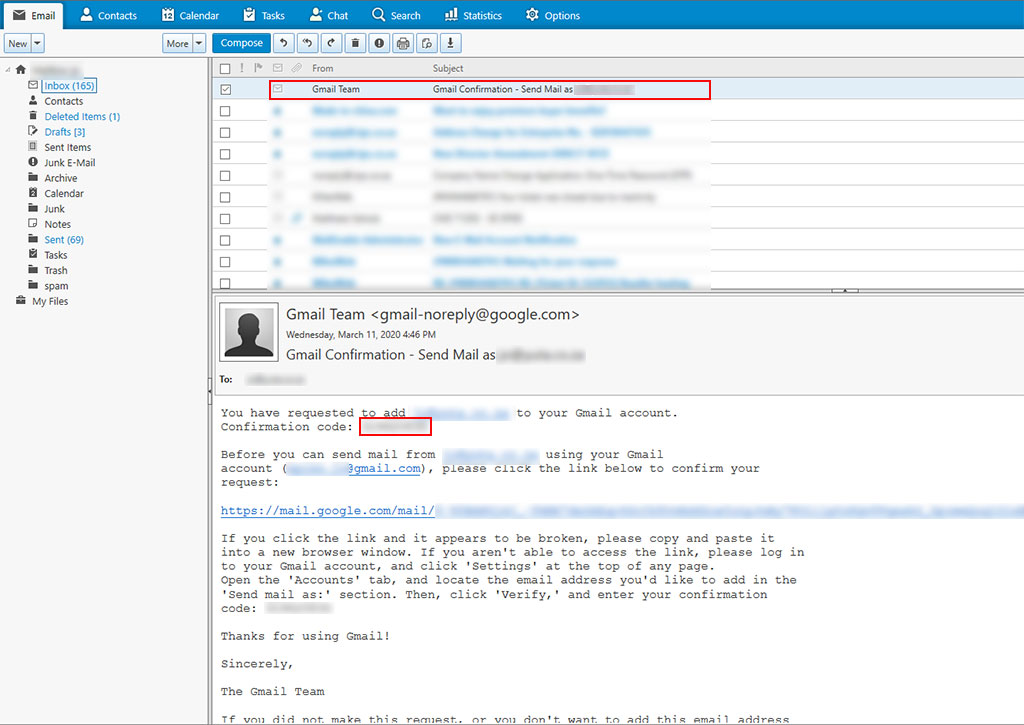
11. Copy and paste the verification code received from Google in the confirmation window and click VERIFY to complete the import process.
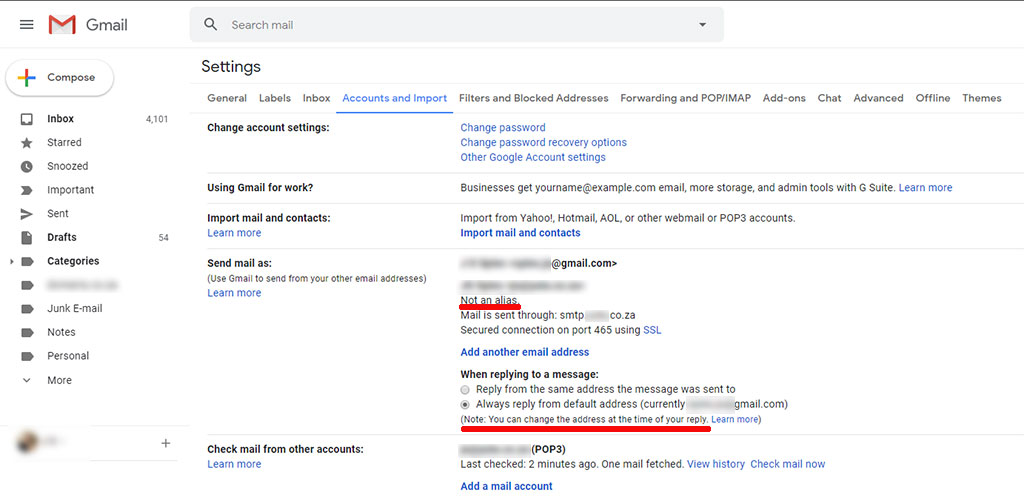
12. After importing your domain e-Mail address to your Gmail account, navigate to SETTINGS. Select the ACCOUNTS AND IMPORT tab under the SEND MAIL AS section. Select MAKE DEFAULT next to your domain e-Mail address. By doing this, all your messages will seem to be sent from your domain e-Mail address by default.
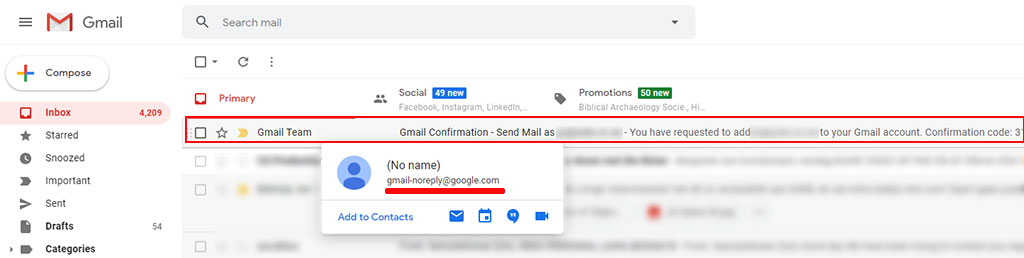
13. You should also receive a confirmation e-Mail in your Gmail account.
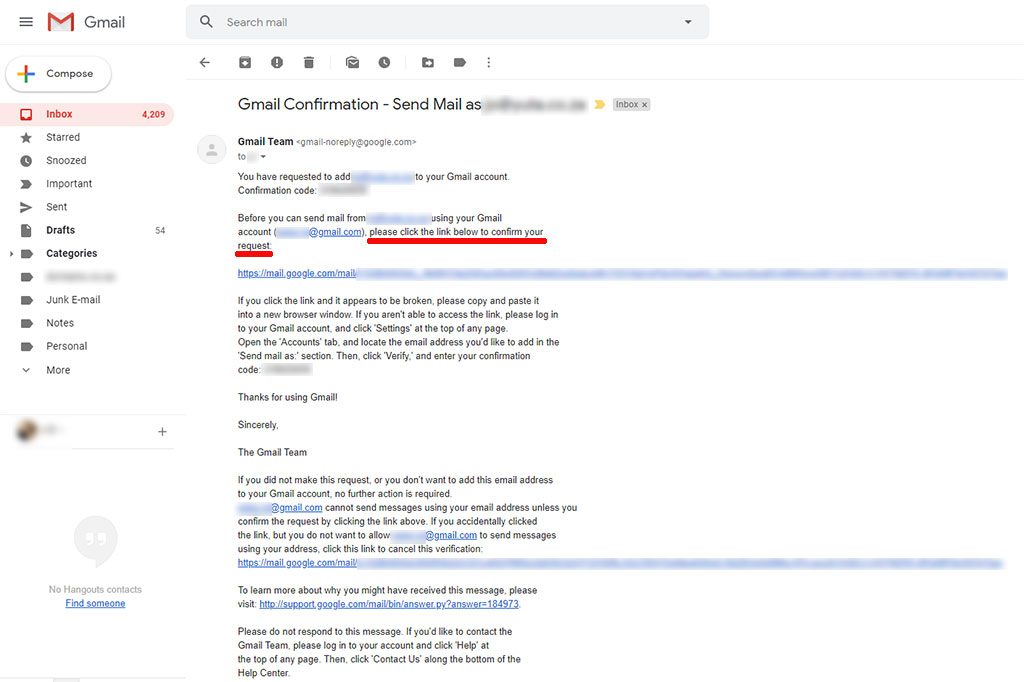
14. Open the message and click on the link to confirm your request.
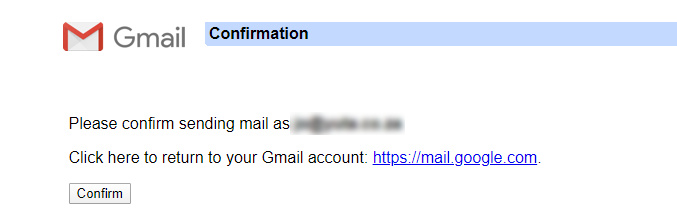
15. Ensure the mail account reflecting in the confirmation message is correct and then click CONFIRM.
16. You will be provided with the below message to confirm the process was successful.
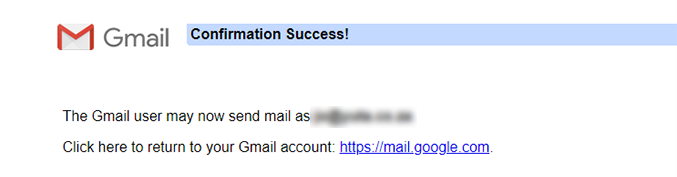
Congratulations! You have now setup your domain e-Mail address as the default sending address in your Gmail account.
Keywords:
Import your domain Email into Gmail, gmail for smtp client, setup email account in gmail, domain email setup in gmail