Sections
This is an easy guide on how to setup your email address on outlook:
What you need to know:
Incoming Mail Server: Please refer to mail settings for recommended settings
Outgoing Mail Server: Please refer to mail settings for recommended settings
Outgoing Server Requires Authentication – should be enabled
Outgoing Server: 465 (Recommended, see step 6.)
Here we go:
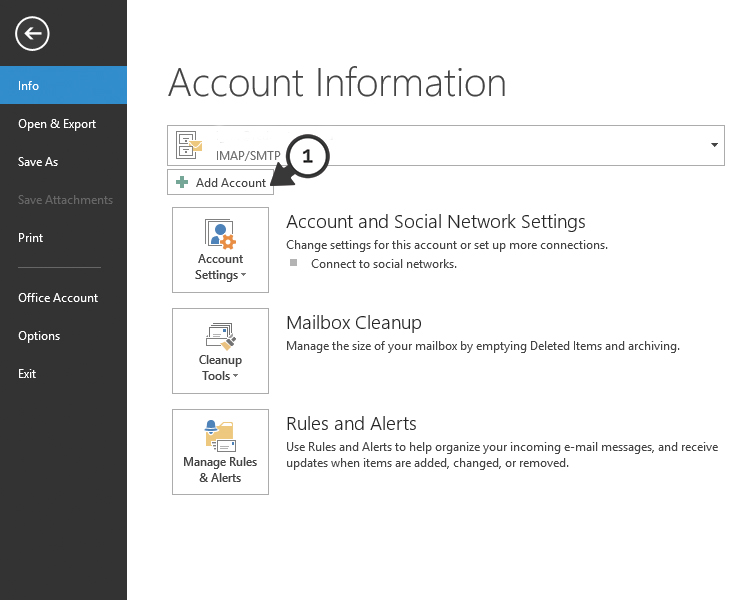
1. After opening up Microsoft Outlook 2013, in the (1) upper left-hand corner select FILE and then select ADD ACCOUNT
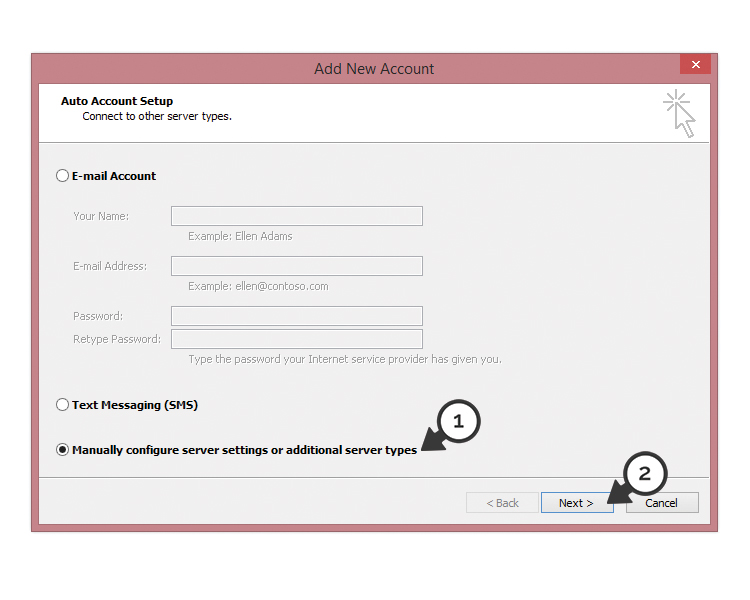
2. On the AUTO ACCOUNT SETUP page, select the 3rd option. (1) MANUALLY CONFIGURE SERVER SETTINGS OR ADDITIONAL SERVER TYPES and select (2) NEXT
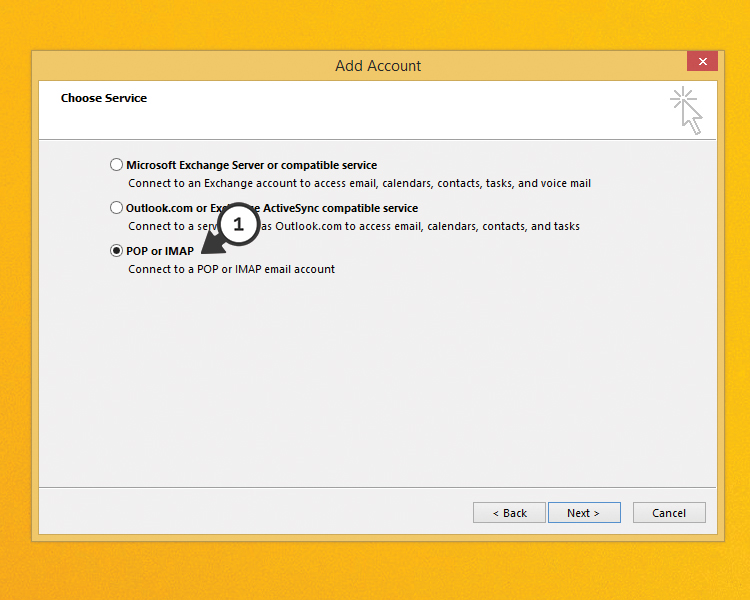
3. Next choose (1) the service listed as POP OR IMAP and select NEXT
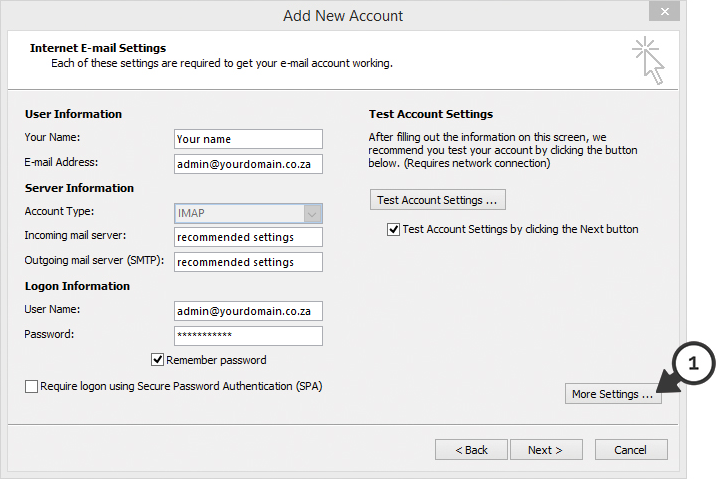
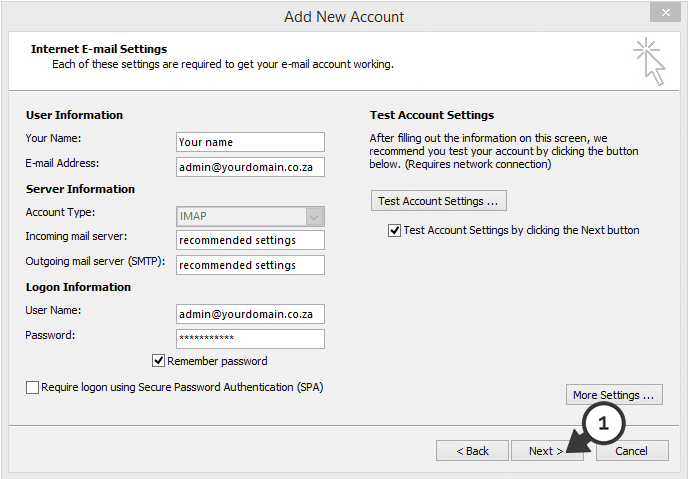
4. On the INTERNET EMAIL SETTINGS page you will be required to fill in your email settings. Kindly confirm the recommended settings below:
- Incoming Mail Server: mail settings
- Outgoing Mail Server: mail settings
After you’ve filled in the required details, (1) select the MORE SETTINGS option.
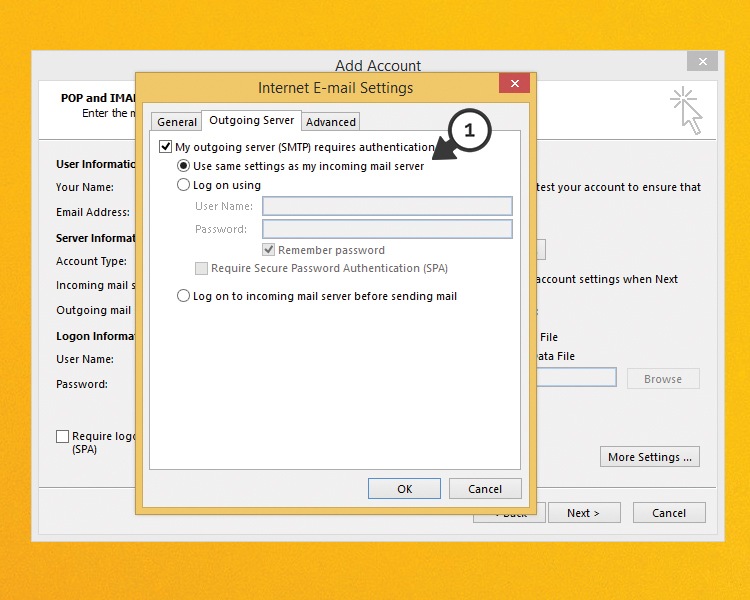
5. Select the OUTGOING SERVER tab and then select the option – My outgoing server (SMTP) required authentication. Also select Use same settings as my incoming mail server then navigate to the ADVANCED tab.
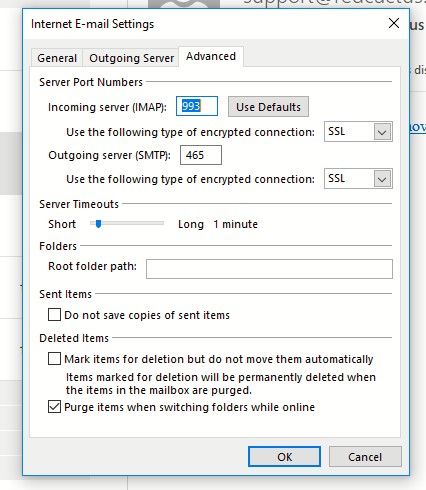
6. On the (1) ADVANCED tab screen, set both drop-downs to SSL ,then set the Incoming server (IMAP) to 993 and (2) Outgoing server (SMTP) to 465 and select OK
7. (1) Select NEXT
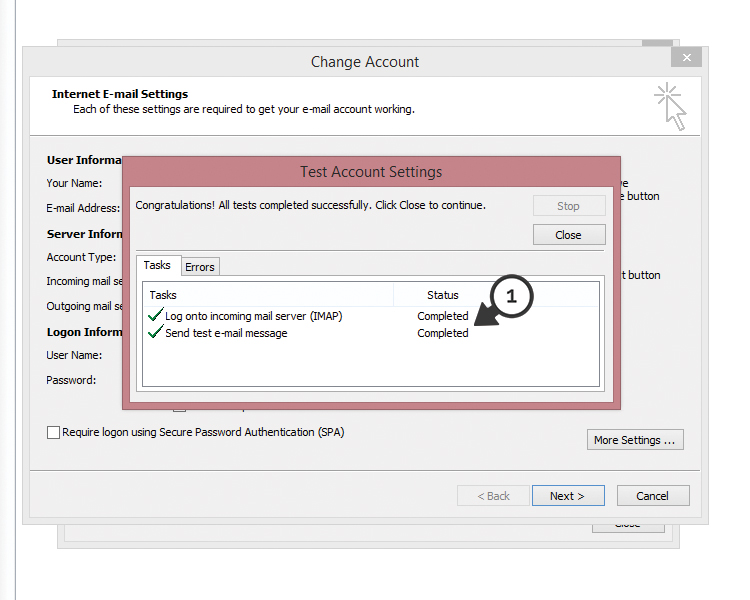
8. After selecting NEXT your account will now authenticate with our mail server and you should receive the following confirmations
9. Now select the FINISH option.
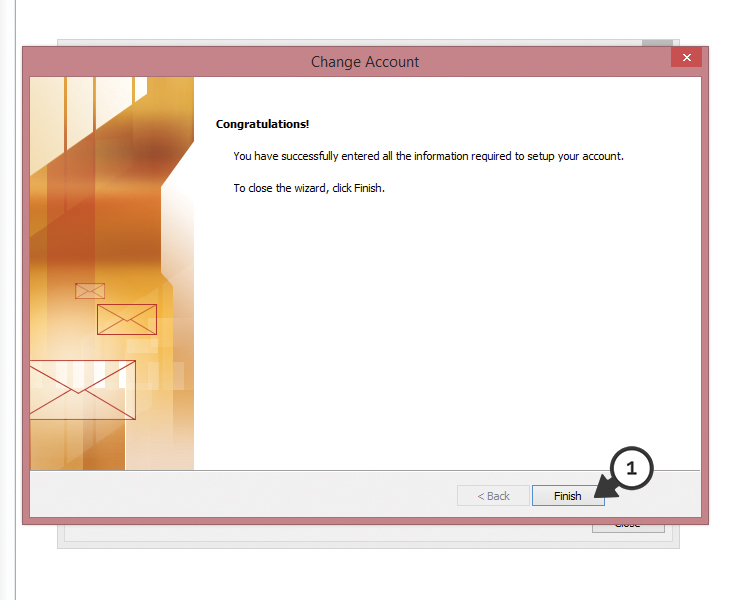
Congratulations! You have now successfully set up you email account on Microsoft Outlook 2013
Keywords:
Email on Outlook 2013+(IMAP), outlook 2013 email setup, setup email outlook 2013