Sections
Login and upload
- You just received two files required to upload your new WordPress Theme. The one is a zip file called Divi.zip and the other will be the site content file called yourtemplate.xml.
- Login to WordPress as an administrator and follow these steps to upload and activate your new Theme
Important steps
(Follow these steps exactly in order to install and run the new theme on your WordPress website)
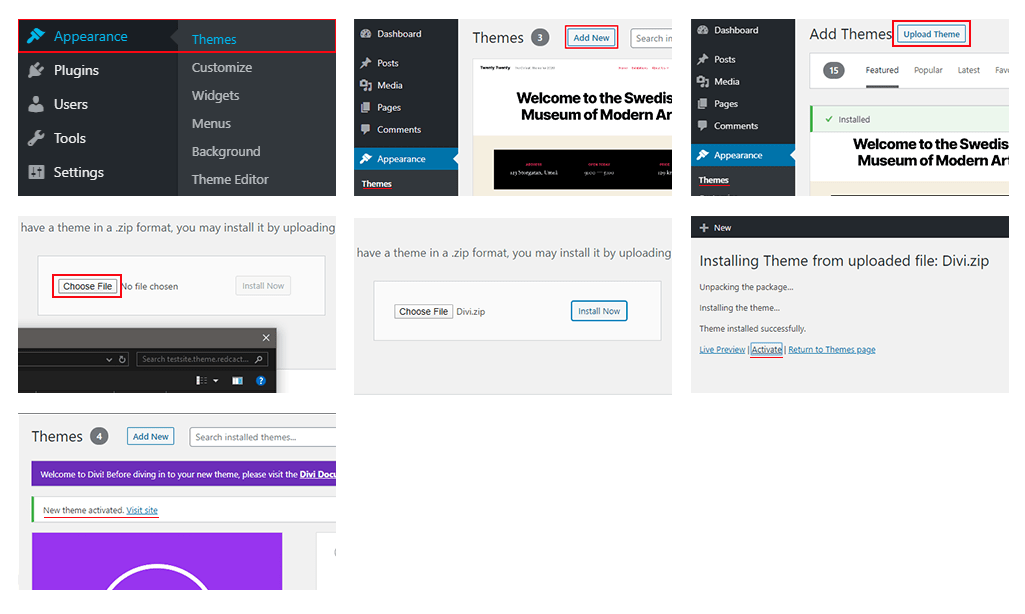
- Appearance >> Themes >> Add New >> Upload Theme >> (Choose File > Divi.zip, Install Now and Activate Divi Theme)
- VERY IMPORTANT: In order to send out emails from your website you need to have SMTP Authentication activated on the website. View this article for instructions to download and install the WP EASY SMTP Plugin
- Woocommerce (If your Theme that you choose supports Woocommerce (Shopping Plugin)) Plugins >> Add New >> Search Plugins “WooCommerce by Automattic” Plugin. (Install and Activate Plugin. The setup wizard, can be skipped or completed.)
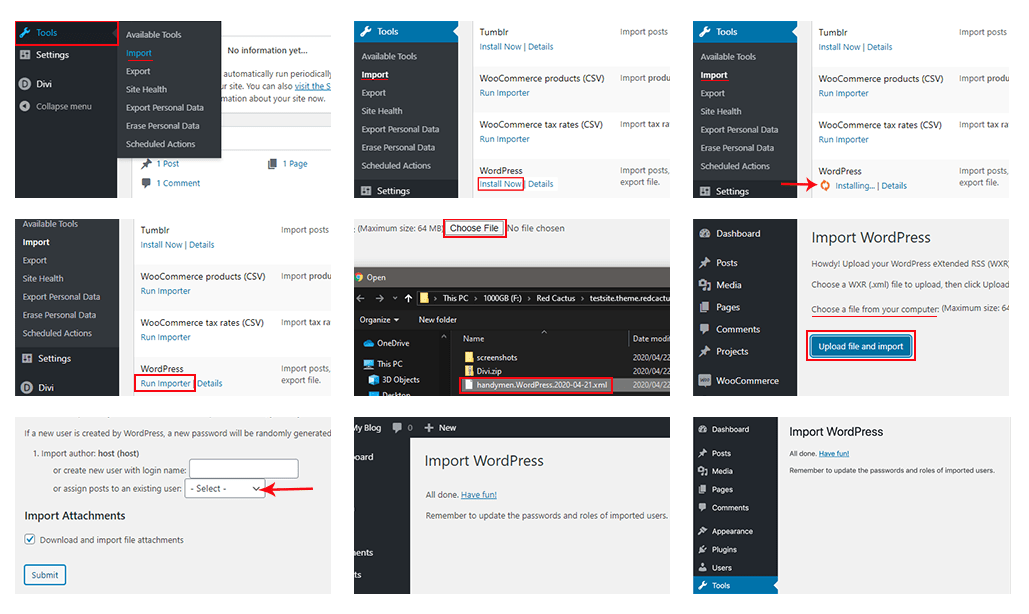
- Tools >> Import >> WordPress >> Install now >> Run Importer >> Choose your file [yourtemplate.xml] >> Upload file and import. (Select “Download and import file attachments” under Import Attachments) (This could take a couple of minutes to complete)


Enable appearance features
(You need to configure some WordPress appearance settings in order for your newly activated theme to display and function correctly)
- Appearance >> Menus (Display location >> Select Primary Menu and Save)
- Appearance >> Customize >> Homepage Settings (Select A static page and pick the Home page in the drop-down option under HOMEPAGE and press Publish)

Enable headers, footers and content
(Our themes make use of a header, body, and footer. Please enable them by stepping through the following steps)
- For the following steps, only press SAVE AT THE END.
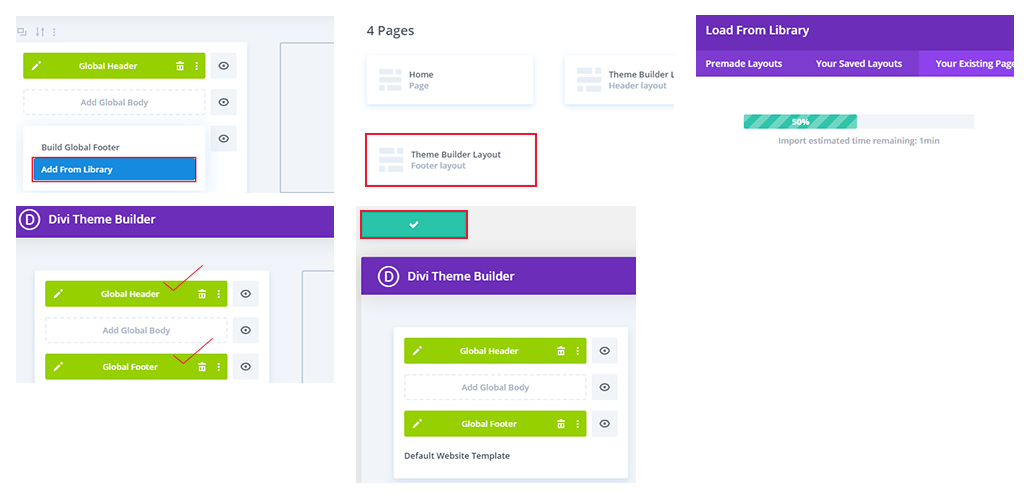
- Divi >> Theme Builder >> Add Global Header >> Add from Library >> Your Existing Pages >> Theme Builder Layout (Header Layout) >> Do Not Save Changes
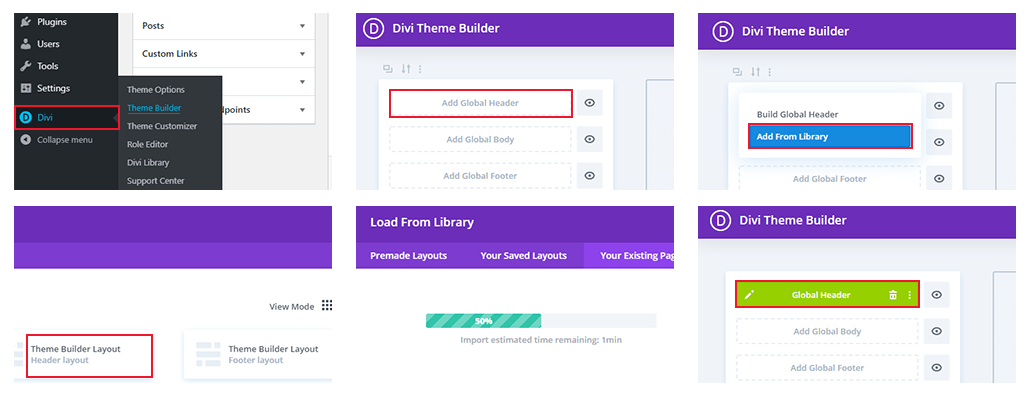
- Divi >> Theme Builder >> Add Global Footer >> Add from Library >> Your Existing Pages >> Theme Builder Layout (Footer Layout) >> Do Not Save Changes SAVE CHANGES and exit.
Summary
Your site is ready to use. Open your website domain address or My Blog >> Visit Site!
Next Steps
-
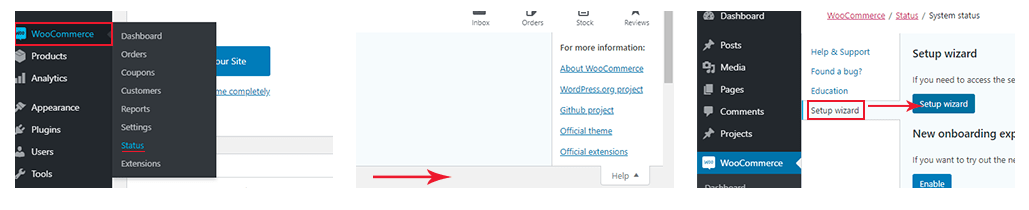
- If you have skipped the WooCommerce Store wizard, you need to run this now. Select WooCommerce >> Status >> Help >> Setup wizard >> Setup wizard to start it and follow the steps.
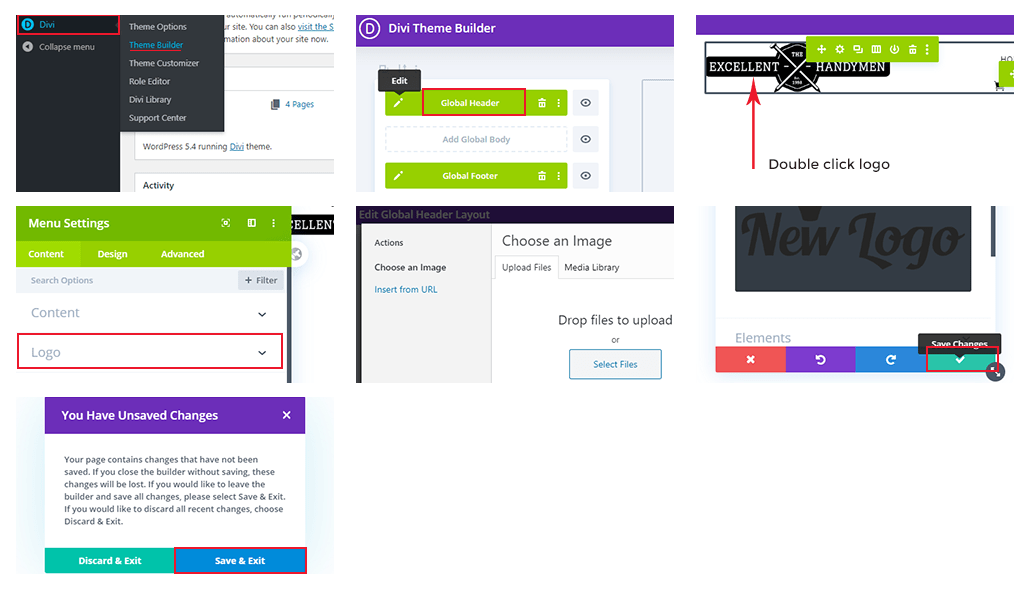
- Change your logo. Divi >> Theme Builder >> Edit Global Header >> Double Click your logo >> In popup >> Logo >> Click to replace >> Save.
- If you have skipped the WooCommerce Store wizard, you need to run this now. Select WooCommerce >> Status >> Help >> Setup wizard >> Setup wizard to start it and follow the steps.

Keywords:
Install wordpress theme, wordpress theme install, how to install wordpress theme