Sections
SMTP PLUGIN
A STMP plugin is required for a WordPress site if you have a contact form for website submissions.
This is an easy and simple guide for adding a SMTP plugin on WordPress
Log into your WordPress dashboard with your correct username and password.
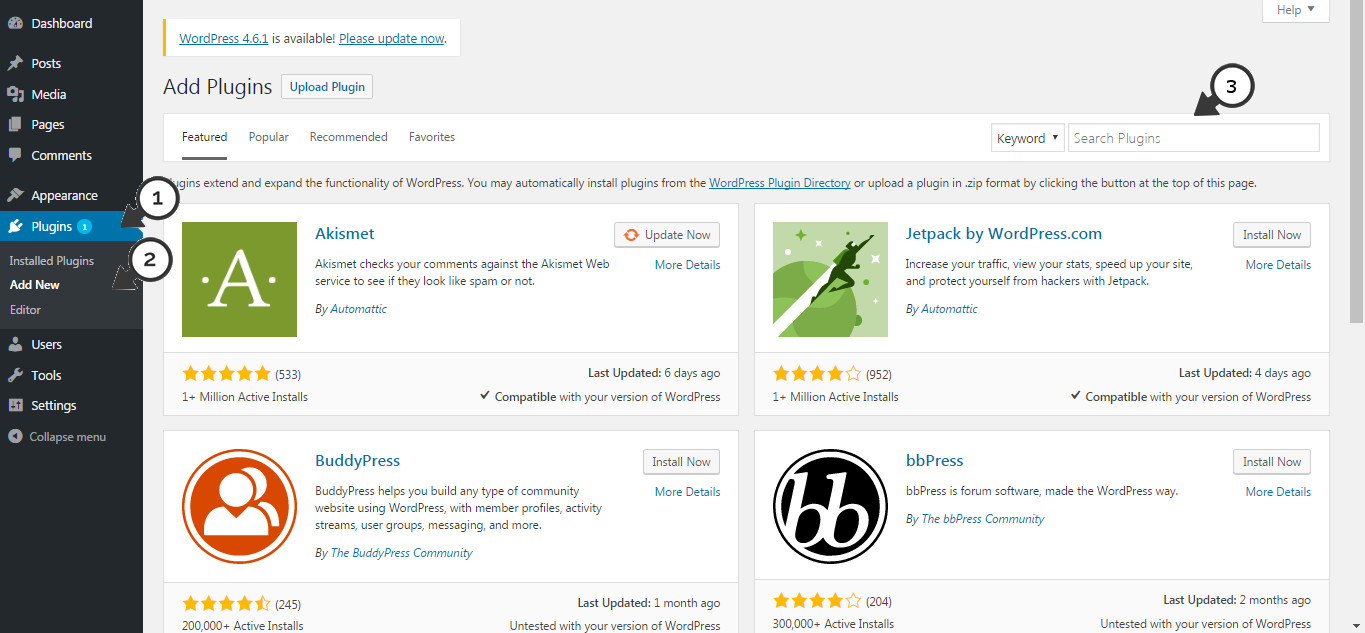
- After logging in on the panel, on the left bar, select (1) PLUGIN and (2) Select ADD NEW. On the top right search bar, type in (3) Easy WP SMTP, and select search.

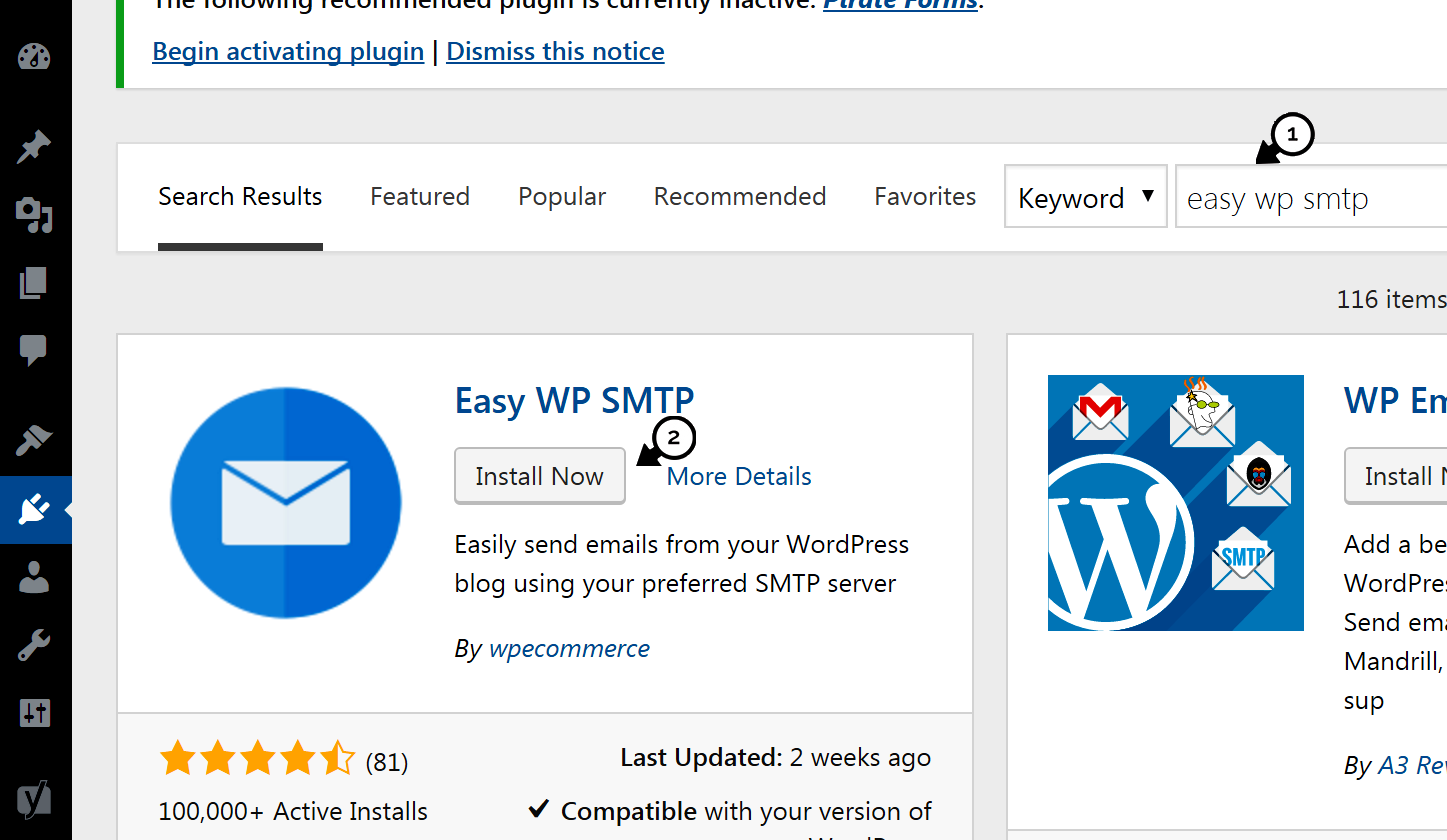
2. Next, You will see Easy WP SMTP will appear, Select (1) INSTALL NOW

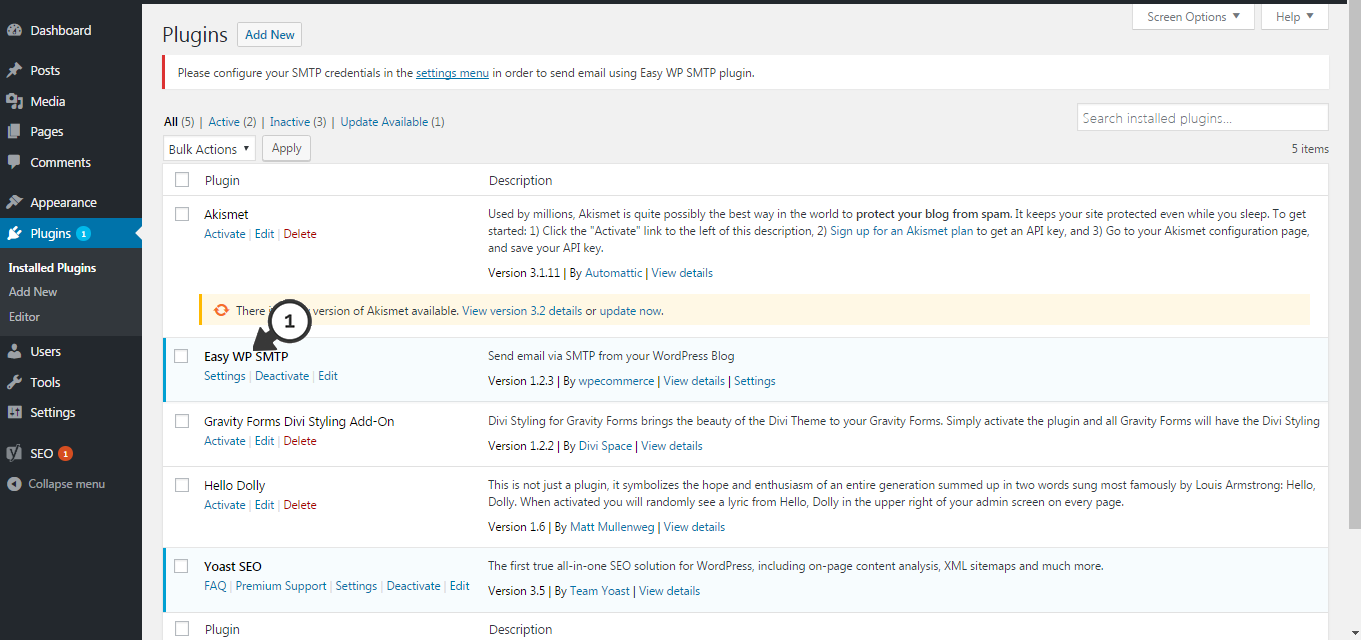
3. After the installation process completed, (1) SELECT ACTIVATE, and you will be directed to the installed plugin page

4. On the installed plugin page select (1) SETTINGS under the Easy WP SMTP heading

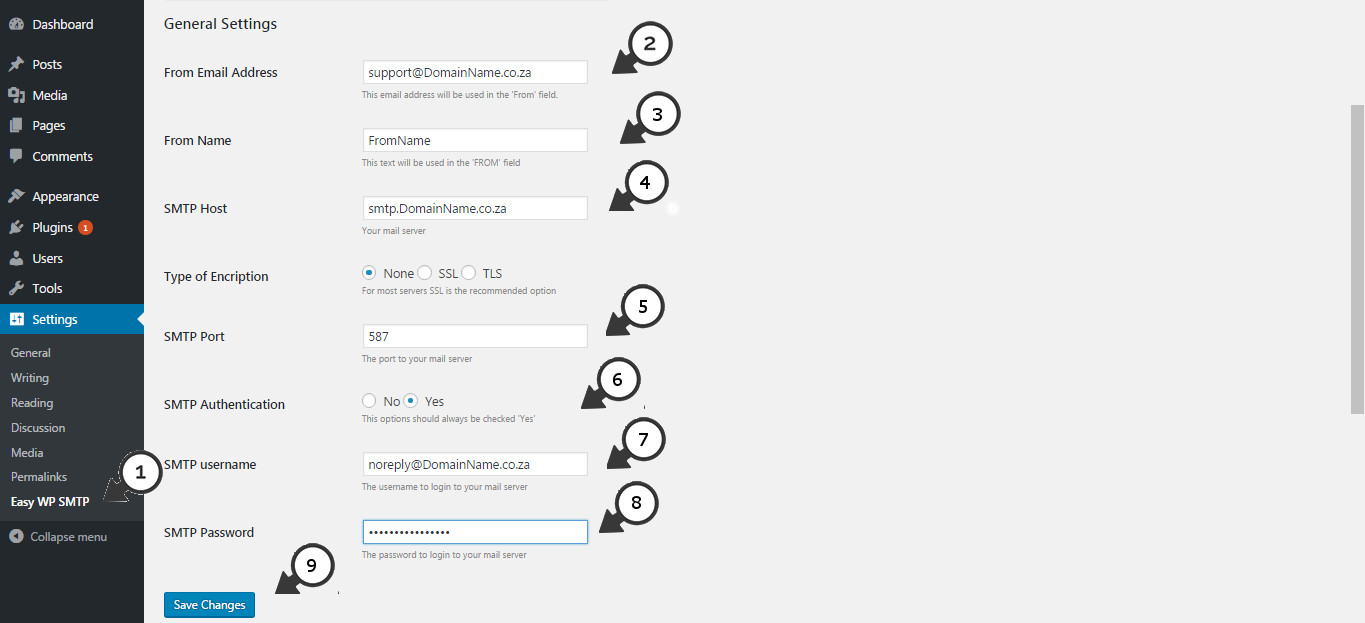
5. (1) In the Easy WP SMTP tab, under GENERAL, complete the necessary information that is required
WE STRONGLY SUGGEST THAT YOU CREATE AN EMAIL FIRST FOR THE SMTP FOR EXAMPLE noreply@your-actual-domain.co.za
- (2) From Email Address: The email address that will be used to send emails to your recipients
- (3) From Name: The name your recipients will see as part of the “from” or “sender” value when they receive your message
- (4) SMTP Host: Your outgoing mail server (example: smtp.DomainName.com)
- (5) SMTP Port: The port that will be used to relay outbound mail to your mail server (Preferably 587)
- (6) SMTP Authentication: No/Yes (This option should always be checked “Yes”)
- (7) Username: The username that you use to login to your mail server
- (8) Password: The password that you use to login to your mail server
- (9) Select Save.

Keywords:
wordpress smtp plugin, smtp plugin wordpress, smtp plugin, install smtp plugin, setup smtp plugin wordpress, WordPress not sending email
